faq
Each Ohora kit contains 30 nail strips in 15 different sizes.
To identify the correct size nail strip, line your nail against the strip sheet. Then, compare which size best matches the width of your cuticle and nail bed.
Don’t worry if your natural nail and the closest-sized strip aren’t an exact match - you can stretch the semi-cured gel to configure to your nail. If in doubt, pick a strip slightly smaller than your natural nail and stretch to make it larger.
※ Before applying a nail strip, be sure to wipe away oil and moisture on your nail with a prep pad. This will allow the strip to adhere better to your nail.
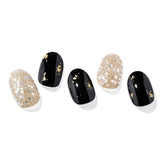
Some Ohora kits contain nail strips with rhinestones, pearls, and other nail gems. These kits will include a sheet of clear protective nail strips.
Protective nail strips serve as a shield against air bubbles, oils, and damage from any gems.
How to Use Protective Nail Strips:
1. Remove moisture and oil from your nail with a prep pad.
2. Select the correct size protective strip and attach to your nail.
3. Attach the decal strip carefully on top of the protective strip and smooth down firmly.
4. Cure the nail underneath a UV LED gel lamp 1 - 3 times.
※ To secure larger gems, cure an additional 1 - 2 times at various angles around the nail. This will ensure that all parts of the gem are sealed into place.
Yes - you can use a base coat or top coat together with your nail strips. However, because Ohora nail strips are a gel-based substance, please use gel or gel-compatible base and top coats.
Base Coat:
Ohora nail strips are more adhesive to and safely removed from clean, bare nails. On that note, we recommend that you refrain from using a base coat underneath your nail strips.
Top Coat:
Ohora nail strips come pre-treated with a gel top coat. However, if you’d like to extend the length of your manicure or pedicure, you can apply a gel top coat along the edges of your nail strips.
Yes - you must cure your Ohora nail strips with a UV LED lamp to complete your manicure or pedicure. Any UV LED lamp with a power rating of 6W can be used to cure your nail strips.
Ohora nail strips come out of the package semi-cured, meaning that the liquid gel in your strips has only been 60% pre-hardened. Because they aren’t completely cured, you can easily stretch and configure your strips to the shape of your nail. However, this also means that will smudge or shift around if left uncured.
We recommend that you cure your nail strips under a UV LED lamp 1 - 3 times for the liquid gel to harden completely. This will seal the strips in place to your nail.
※ Ohora nail strips are sensitive to light. Avoid using your UV LED lamp near any unused nail strips.
The Ohora Gel Lamp is a portable USB UV LED nail lamp you can use to quickly and safely cure your nail strips.
The lamp isn’t rechargeable, and must be plugged into a USB outlet during use.
The lamp features two time settings - 45 seconds and 60 seconds. 45 seconds is the standard curing time, while 60 seconds is better for thicker designs or those with nail gems. You can adjust the time using the button on the lamp’s main body.
※ Press button once to turn on light for 45 seconds. ※ Hold button for 2 seconds to turn on light for 60 seconds.
The lamp will turn off automatically after each curing time.
After curing your nail strips once, inspect them to see if they need to be cured again. We recommend that you cure your nail strips 1 - 3 times for the liquid gel to harden completely.
Ohora nail strips are sensitive to changes in light and temperature. Your nail strips will harden if exposed to temperatures below room temperature (68 – 72°F) or bright light (sunlight or UV LED lamps).
To keep them in usable condition, please store any unused or leftover nail strips in a cool, dark place.
If your nail strips have hardened due to light exposure, they cannot be returned to their original form.
If your nail strips that have hardened after being exposed to colder temperatures will become soft again when returned to room temperature. You can also rewarm your hardened nail strips by holding them between your hands for 10 minutes.
※ Change up your look by mixing and matching your unused or leftover nail strips. ※ Maintain your look by replacing worn nail strips with new ones.
Each Ohora kit comes with a wooden cuticle stick. Soak this stick in your preferred nail polish remover and push to remove your nail strips.
1. Dip enclosed wooden stick into nail polish remover.
2. Push stick gently against the edge of your nail strip. Nudge strip in the direction of your cuticle to minimize damage to your nail.
3. Keep pushing until entire nail strip peels up and detaches from your nail.
1. Dip enclosed wooden stick into nail polish remover.
2. Push stick gently against the edge of your nail strip. Nudge strip in the direction of your cuticle to minimize damage to your nail.
3. Keep pushing until entire nail strip peels up and detaches from your nail.
If you have any questions or concerns, please contact our Customer Service Center.
You can reach us by e-mail (help_global@ohora.com)
Unable to find satisfactory answers ?
Contact Us